Since I have gotten a few requests for tutorials on how I style my hair, I thought it was high time that I actually followed through on my promise of writing a post about it. Since I managed to not snap any photos for an OOTD post for today, this is the perfect filler.
I do this on most mornings as a means to tame my naturally thick and wildly wavy hair. Some days it turns out better than others (
THIS is an example of a good day), and of course the day I choose to photograph this process my hair ends up being fist-shakingly frustrating. Hmmph.
BUT, here's the process! It's pretty quick and easy and it takes me a scant 10 minutes to do my hair each morning.
1.
Put your hair into a single French braid the night before. I don't do mine too loose or too tight, but it's up to you how you want to braid it. A tighter braid makes more defined waves and a looser one creates less defined ones. As mentioned before, my hair is naturally wavy, so putting my hair into a French braid helps me to control how those waves look the next day.

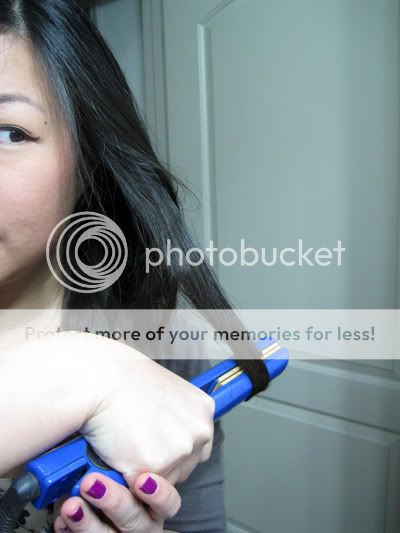
2. Using a straightening iron, flip up the ends of your braid the next morning. If you don't do this, the ends of your hair could look awkwardly straight once you undo the braid.
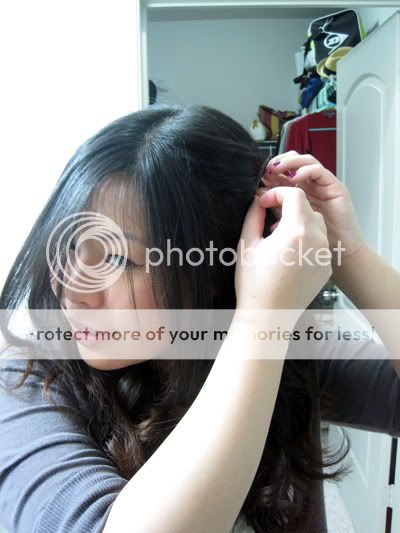
3.
Undo the braid with your fingertips and straighten your bangs. Don't comb your hair. This will make it a puffy mess, so just gently tease out the waves with your fingers. I usually straighten only the bangs framing my face and do so by pulling them out and curling them under with the iron.

This is what it looks like after only those steps. Harsh bathroom lighting not included.

4.
Grab random 1.5-2 inch sections of your hair and curl them. I usually curl the only about 4-5 sections of hair around my face and leave the rest as waves. I don't own a curling iron, so I curl my hair with my straightener. It's a bit complex to explain how you curl your hair with a straightener, so here's YouTube to the rescue!
This girl basically does what I do to curl my hair, so she's worth a watch if you're interested. But here are some of the steps photographed...
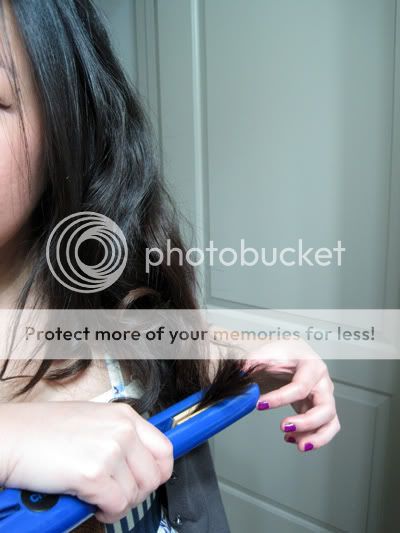
Clamp the hair that you're going to curl around where you want the curl to begin.

Wind your hair over the straightener once.

Twist the straightener away from your face and gently pull down at the same time until the hair slides into place. Pump the straightener down the rest of your hair.

And BOING! A curl! This isn't the best picture evidence, but you get the idea. Use your fingers to relax the curl by winding it around your finger and pulling it loose.

5.
Finish by clipping up part of your hair or otherwise styling it if you so desire. I also curl the very ends of my bangs and flip up the ends of the rest of my hair again.

DONE!

Like I said before, this doesn't always turn out terrific, but it does work most days and is a great way for me to manage my head of hair. Looking at these photos, I think it's obvious that I need to get some product to deal with my winter-stressed hair, though!
Hopefully I've given some of you with unruly hair like mine something new to try! See you all tomorrow with an OOTD!

 dress, f21
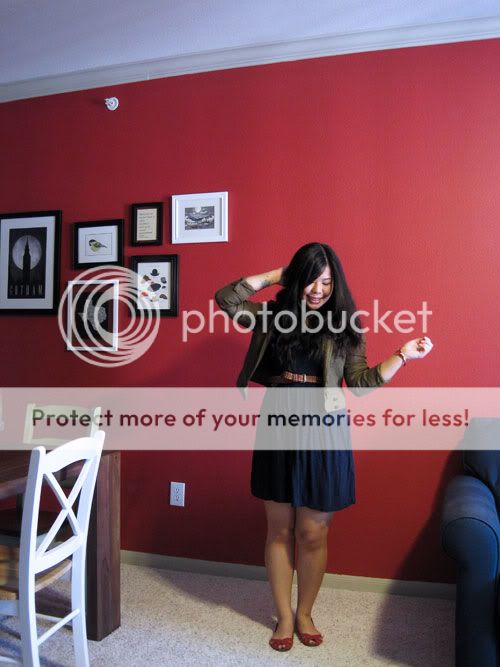


